A Blog For The Farm Happenings And Whatever Else Strikes My Fancy.

Monday 27 February 2017

Hide The Mermaid Game


In our house this is called The Mermaid Game, however, it is not limited to mermaids. You know those little glass figures that come in the boxes of Red Rose Tea? Well, that's where our Mermaid came from. But, if your box happened to come with the Sailboat, you could definitely play the Sailboat Game. This could also be called the Army Man Game, the Purple Dice Game, the Little-Pebble-I-Found-Outside Game. You can use anything. 

Now, you may be asking, "What is the Mermaid Game?" Well, basically it's just a game of hide and seek that never ends. 

I don't actually remember how this game started for us. Although, I do know that when it started we didn't expect it to go on for 2+ Years... but I'm so glad it has! Believe it or not, we moved and the mermaid game has continued in out new house. When we were packing everything from our old house I slipped the Mermaid into my pocket, re-hid it at the new house, and simply let the game live on. 

The game-play is really very basic. You find some item you would like to play this with, let your family know (I think we kind of skipped this part and it just happened), and hide it somewhere in your house. Everyone goes about their life as normal and if someone comes across the item they take it and hide it somewhere else. It's that simple. 

As with any game, this game does have rules. Unfortunately, by writing up this post, I have to break the first and most important rule. 

Rule #1: Do not talk about the Mermaid. 
The Mermaid is not discussed. Having said that, there are instances where this rule has been broken. Of course I am breaking it right now, but there was also an instance when it seemed months had gone by and there had been no sign of her. I called an emergency Mermaid meeting and we all agreed, she was missing. A Mermaid hunt ensued, we found her, and the game continued. So yes, we do not talk about the mermaid unless completely necessary.  

Rule #2: Do not remove the Mermaid from her hiding spot or put her into a new hiding spot if anyone is around to see you. 
If you happen to stumble upon her and retrieving her would require climbing on top of furniture and calling attention to yourself, you should definitely wait till the room is not full of people to take her. If you are able to stealthily slip her into your pocket, go ahead. But if there's a chance of being spotted, it can wait. The same goes for putting her into her new hiding spot. 

Rule #3: Do not hide the Mermaid anywhere too difficult to find. 
Clever hiding spots are great. funny hiding spots are great. But hiding her where no one can find her just isn't fun. She should never be completely out of view unless she is in a location that is frequented by most of the family. E.g. The medicine cabinet, the cookie jar, etc. 

Rule #4: Do not hide the Mermaid in any of the bedrooms. 
This rule may not be necessary in every household, but in my house our bedrooms are not high traffic areas. Usually the only people in the bed rooms are those that it belongs to. If your family has two children who share a bedroom and parents to tidy for them and tuck them in every night, then the bedroom would probably be fine. We considered making a no bathroom rule before we decided that it was one of the highest traffic areas as well as one of the most entertaining rooms to hide her in.   

Easy enough right? We take the Mermaid Game very seriously in our home and you will be scolded if you are found breaking any of the rules. You may also be asked to relinquish the Mermaid to whoever caught you and let them hide it, rightfully losing your turn. 

Another good idea is to put a limit on how long she can be in one spot. If you have hidden the Mermaid and 3 weeks later you realize she is still in the same spot, then it's probably too difficult of a hiding place and she should be moved. 

Here are just a few ideas to help get you started on your own game. 
 Surround the Mermaid with colors that camouflage her. This can make hiding in plain sight especially fun. If she's camouflaged the eye of your opponents will pass right over her.

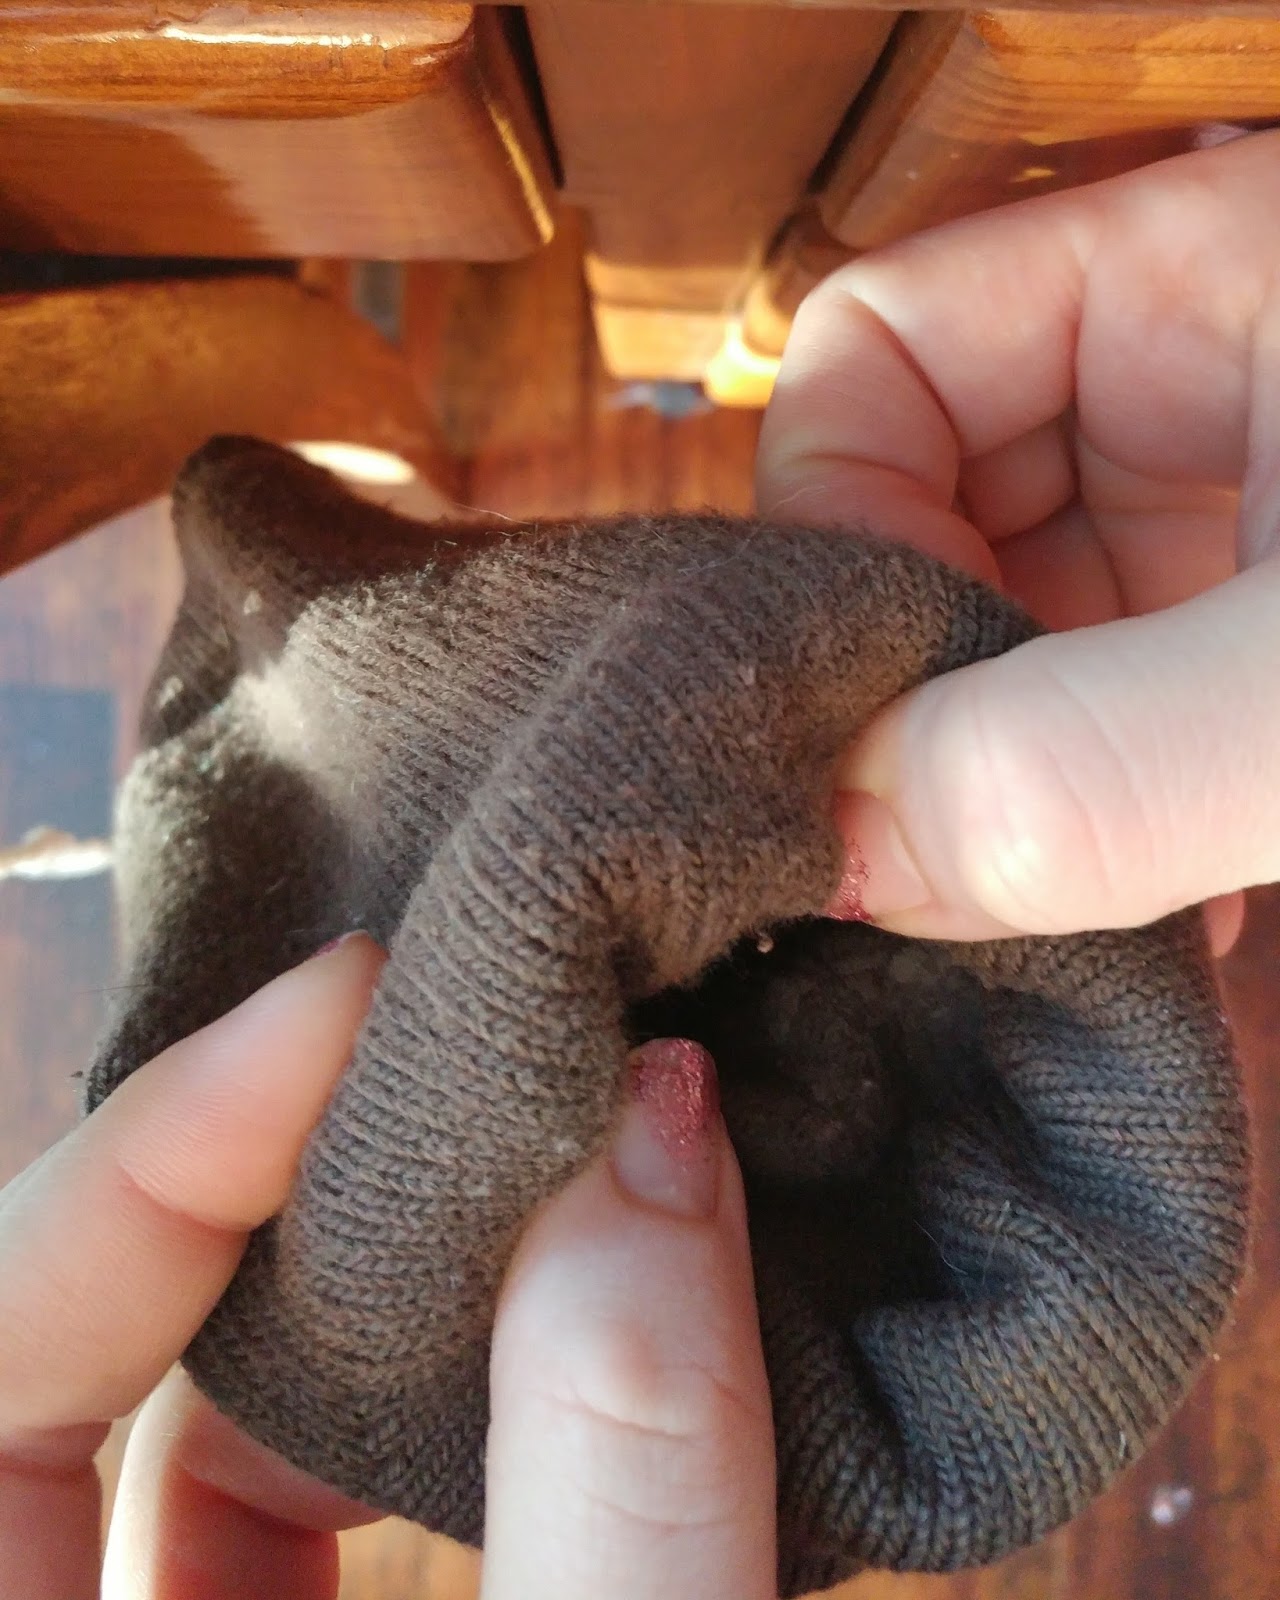
Use the flaws of your home's construction. Little spots like this one pictured below are perfect for the Mermaid. 

 Hide the Mermaid in unexpected places. No one expects her to be in with the straws. Think about where you would be least likely to look and hide her there.

Incorporate her into your seasonal decor. It's extra fun to use things that are not always there. Just make sure she is not packed away with your Easter eggs when spring is over. 


I hope you enjoy this game. Please share your family's thoughts and any rules you would add in the comments. I'd love to hear how this game took off in your household! 


Monday 13 February 2017

Sock Bun Tutorial


This is a super easy hair style that will stay up all day! 

Whether you need the perfect hairstyle for a ballet recital, an easy up-do for your Tinker Bell costume, or you just need a bun that you can count on, this is it. And all you need is a sock, two hair ties, and a few bobby pins


 I first learned how to do this at a birthday party when I was about 15 years old. My friend (the birthday girl) had a woman over to do henna tattoos on us. This woman used to be in the military and she told us that in the military women have to either cut their hair short or get it to stay up and out of the way. She showed us with an old sock how she had been taught to keep her hair up.. I (thinking this technique seemed very interesting) was voted her model... so, even though I ended up having a fantastic up-do, I had no idea how she had done it because I don't have eyes on the back of my head. When I got home that night (yes she let me keep her old sock) I took it down in front of the mirror so I could see how it was done and just reversed the process to put it back up. 

As you see, between being in the military and dancing on stage, this is the perfect bun! 


This past New Year's Eve Costume Party  my sister Mary was Princess Leia and I put her hair up using this same technique only with two side ponytails. And (as promised on that post) I will now give you the tutorial! 


Start by cutting the toes off of a sock. The sock should be a similar color to your hair just in case any of it peeks through, although if your hair is really thick that shouldn't be a problem. 

The thicker/bigger the sock you use, the bigger the bun will be. My sister (my model)  has long, thick hair, and, looking at the picture, you can see there is almost two sections to the bun. If your hair is medium length, and/or you use a bigger sock, the lower part (the part that wraps around the bun) will not be as prominent. 

Now, take your sock at the bottom (where you have just cut it) and hold it in both of your hands so that your thumbs are inside the sock and the rest of your fingers are supporting the outside. Start rolling it outward. Once you have rolled up the entire sock it should resemble a doughnut. 

There are actually things you can buy that do the same thing as this sock. They are called Hair Donuts and you can buy them on Amazon HERE. I have never used one of these, but the way I see it is if you have a sock, why buy one of these donuts? If you have ever used one, please leave a comment and let me know what you thought of it? Is it any different than using a sock? 


Put your hair (or whoever's hair) up into a high pony-tail. The higher the pony, the higher the bun. If you want a bun right on top of the head, that's where the pony-tail should be. 


Put the hair through your sock so the sock sits around the hair-tie at the base of the pony-tail.


Spread the hair over the sock so that you have a nice hair fountain spewing out of the center of the sock. Put a hair-tie over the hair and the sock so that it rests beneath the sock. This creates the bun.


Gather up all the hair that comes out from around the sock and gently twist it all together.


Wrap the twisted hair around the hair-tie, at the base of the bun, and secure with bobby pins. For extra fun add a decorative scrunchie, some silk flowers, wrap a string of beads around it... and Bippity Boppity Boo! Just like that you're ready for the ball! 

..


Thank you Mary for being a very patient model! 

Tuesday 7 February 2017

Valentine's Day Fortune Cookies and Printable Gift Tags


Valentine's Day is almost here and we will soon have chocolate and rose bearers knocking down our doors! I love this time of year. Everything is beautifully white with snow and we have extra comforters on our beds. We can sit safely inside, at our candle lit dinners, as the snow gathers against the windowpanes. It's already so beautiful, then comes along Valentine's Day and we find cute little cards and hunt down flowers to show those we love how much they mean to us. 

 What are your romantic plans for the holiday? 

Why not make some super cute, Chocolate Covered Fortune Cookies?

Whether you make these for/with your kids or for that special someone in your life, anyone would appreciate this delectable commemoration of the holiday. They are super fun to make and an excellent crowd-pleaser! 

I made them as favors for a Valentine's Day Dinner.


What you'll Need

  • Chocolate Chips or Melting Chocolate
  • Parchment or Wax Paper
  • Baking sheet (Optional)
  • Fortune Cookies 
  • Valentine's Sprinkles
  • Saucepan and Metal Bowl or A Double Boiler
  • Rubber Spatula 

I used two 12 oz bags of chocolate chips, one of white and one of semi-sweet milk. But I also made about 150 cookies... So, unless you are making 150 cookies, you shouldn't need that much chocolate. 

The fortune cookies are from Market Basket. They have bags of them for under $2.00 with approximately 40 cookies in them! It's an amazing deal. If you can't get to a Market Basket, I know Walmart had some, though not for as good a price. You can buy them HERE which is a better deal than Walmart, but not as good as Market Basket. If you're looking for them at your grocery store they are generally kept in the produce department. I know... Go figure. 

Also, you should buy more fortune cookies than you'll need. Some of them will be broken. 

I wanted sprinkles that were more specifically for Valentine's Day than just pink and red (Like little hearts or something) But I had the darndest time finding them in the stores. I have, since, looked on Amazon and they do have some that are super cute! 

Melt the White chocolate on a low temp

Prep: You'll need to open all of the fortune cookies (If yours are individually wrapped.)  If you're doing this with kids, they should all be opened ahead of time. It can take a while to open them - especially if you are making 150 of them - and they can easily break in the process if you're not careful getting the wrapper open. 

Set up your double boiler. I just used a small sauce pan and a stainless steal bowl that fit nicely on top. Put water into the pot so it just kisses the bottom of the bowl. Put your chocolate into the bowl. This double boiler method will allow the chocolate to melt with out it being directly on the heat, preventing it from burning. 


Lay out the Parchment (or Wax) paper on the counter. If you need to transport them before they harden you can put the paper on a baking sheet rather than on the counter. 

Prepare for the sprinkles by setting out a plate that you can shake them over for minimal mess.... who am I kidding? There will be sprinkles everywhere. The plate's really just there to make you feel better about yourself. 


Melting Milk Chocolate: Melt the milk chocolate with the heat at medium. Once it's all melted turn the heat to low or simmer to keep it warm. Stir occasionally.

Melting White Chocolate: White chocolate doesn't behave the same way as milk or dark chocolate when it's melting. You have to keep the temperature at low or simmer and be really patient with it. If you have the heat too high, or rush it, you'll cook the chocolate, causing it to be lumpy. Which doesn't work at all for dipping. Stir occasionally.

Don't melt all of the chocolate at once. You can start with a little and keep adding to it as you go. It's hard to estimate how much you'll need and this keeps you from wasting any. It will also keep the white chocolate from being over the heat for too long. 


Dipping and Decorating: Now for the fun part. 
Once the chocolate is all melted dip the cookies into the chocolate. Before the Chocolate hardens, hold the cookie above the prepared plate and sprinkle your sprinkles over it. I did also try dipping the cookies into the sprinkles. It seems with the white chocolate the dipping method works okay, but the milk chocolate look a lot better if the sprinkles are shaken/poured over them. 


Now that I'm thinking about it, maybe with kids the tidy factor of dipping outweighs the attractive factor of sprinkling. 


Place the dipped and decorated cookies onto the parchment paper with the nicest side facing up. Leave them till the chocolate hardens. After about 10-15 minutes they peal off of the paper beautifully. 

Print out the Valentine's Day Tags given below.  Place the cookies into little plastic bags and tie the tag on with a pretty pink ribbon. 


I made these cookies the same way (only with these cool metallic and pearl sprinkles) as favors for Our New Years Party and they were a big hit. I've included the PDF for the New Year's tags if you want to make more chocolate dipped fortune cookies to celebrate at the end of the year! 


If you make these, leave a comment with your link. I'd love to visit your page and see the cookies you make!  Happy Valentine's Day


Now, three of these remain: Faith, Hope, and Love. But the greatest of these is Love.  ~  1 Corinthians 13:13

Saturday 4 February 2017

Peanut Butter Brownie Topping


In just 5 minutes you can transform your ordinary brownies into something that will never be forgotten in the awe-struck minds of your guests. How can you pass up that opportunity? And when peanut butter is involved, doesn't that make it so much more irresistible?


 No need to keep you waiting, we'll jump right in. 


All you'll need is chocolate chips, creamy peanut butter, a zip-lock bag, a pan of cooked bownies, and a microwave. 

Chocolate: You can use either white or milk chocolate chips (go ahead and try peanut butter or butterscotch chips if you'd like!) I used white here because it's what I had. If you use milk it will make darker lines and it will taste a little more chocolaty because they have a stronger flavor than white chocolate.  

Peanut Butter: Peanut Butter is life. However, I do understand that some people can't have or don't like (Actually I don't understand the latter) peanut butter. In which case you could use a different nut butter and I'm sure it would come out almost just as good. 
This link HERE is for a natural peanut butter that Skippy makes. The oils don't separate like a lot of the natural butters, so it doesn't feel oily and need stirring. Pretty neat! 

Plastic Bag: Really any plastic bag would do but having the zip seal is really convenient and makes it so much easier.

Brownies: Just use your favorite brownie recipe. The brownies can't be too hot and not yet cut into. I know, that sounds absolutely impossible. I, too, am a cut into it as soon as it's out of the oven kind of gall. You can do it though. Self control. 

Microwave: I'm sure some of you do not have microwaves. I have not tried this myself so you would be guinea pigging it. Or, trying it "at your own risk" but I believe if you were to put the bag into a bowl of warm water it would melt everything similarly. You don't want to literally melt EVERYTHING, and certainly not the plastic bag, so please just make sure it's not too hot. No boiling should be necessary. 


Magic: To start, put the Peanut Butter and chocolate into the bag. I don't measure things, but I do make sure it's about equal amounts of Peanut butter and chocolate. It's probably 3 Tablespoons or so of each but you can do more or less depending on how many brownies you made. 

Zip the bag shut and stick it in the microwave (or try the warm water trick if you don't have a microwave) You need to zap it till it's all melted, but don't microwave it for more than 15-20 seconds at a time. I microwaved mine for 20 seconds twice.

Every 15-20 seconds, massage the bag so the contents really blend together. 


Not done yet

If you can still make out the difference between the chocolate and the butter, it needs more time. 

Once it's all melted and mixed, rub the bag so the mixture is all in one corner. and snip off the tiniest bit off the corner of the bag.  For a smaller, slower stream cut the hole smaller, for a thicker, faster stream cut it bigger. I actually prefer my lines a lot smaller and closer together but (OOPS) I cut my corner to big by accident.


Very tiny! Remember, you can always make it bigger if it's too small.

Just as you would with cake icing, hold the bag so the frosting is in your hand and the top of the bag sticks up above your fist. Very gently, squeeze the bag and draw out the lines in your desired pattern. You can test it on a something else (a paper plate? a napkin?) if your unsure of the needed pressure.

I said before to use an uncut pan of brownies, however, if you cut them and remove them from the pan you could make a different design on them and do them individually. This is just a lot easier.  


Set the pan of brownies in the fridge for twentyish minutes till the icing hardens and sets, then gently cut into them and enjoy! 

The icing on the.... cake? This is SO mess free. No bowls to clean after, no frosting tips to scrub. You just throw the bag away and you're done! 

I have done this for a baby shower and they were a huge hit just on account of that easy little detail. Who doesn't love a little added flair to their food? When you take a small step more, it really does make a difference. And it's fun! 

Refrigerate for 20 Minutes before serving
EXTRA TIP: If you have any extra icing left in the bag, squirt it onto your toast and Oh My Gosh! you won't be sorry. 

It would also be amazing on ice cream. In fact, ditch the brownies, I just had an epiphany. I am going to make this for the sole purpose of drizzling over ice cream. No need to buy peanut butter sauce, I've got us covered! 


 So, whether you eat or drink, or whatever you do, do it all to the glory of God. 1 Corinthians 10:31


Thursday 2 February 2017

Kidding Supplies Checklists

Be sure you know the condition of your flocks, give careful attention to your herds - Proverbs 27:23


With kidding season here I find it helpful to have a list of all the things I'll need. Even if you know, and have, all the needed supplies it is helpful to have a list handy as a reference, just to make sure you aren't forgetting something.
Or, if this is your first time breeding, it can give you confidence to  know that you are prepared.
 I've done the work for you and put this list together.

If you have anything to add or that you do differently, please leave a comment.

Kidding Supplies:

  • Baby monitor (You will want to keep a monitor near the mother for the days approaching her due date. Get so you are familiar with the usual 'barn sounds' and if there's any difference, check on her. The kidding can be very quick, Keep the receiving end near you if you want to be there for it.)
  • Kidding Stall/Pen/Crate (the doe should not be with the herd when she is kidding. She needs to be isolated in a separate, quiet space where she wont be bothered by nosy aunts) 
  • Flashlight (for those "fun" Nighttime births)
  • Lots of clean towels.
  • Scissors (to cut the umbilical cord if it doesn't break or if it's too long)
  • Iodine (to clean the cord)
  • Unscented Floss (to tie off bleeding umbilical cords)
  • Rubber gloves (I don't use gloves personally, but they could be helpful if you are squeamish at all. I know for a lot of people gloves are a must) 
  • Infant Nasal Aspirator (to clear the kid's nose of womb slime)
These are just the basics. Many things can go wrong during a birth, in case of difficulty you will want to contact your vet.
Make sure that all your supplies are clean, don't use anything that's unsanitary.

Post Kidding Supplies - Mother:

  • Molasses (I give the mother a mixture of hot water, molasses, and grain after the birth to give her extra energy - they love it!)
  • Hot water and Hay (make sure she can get all that she wants.)
As important as it is that she gets her energy back, it is also important that the mother doesn't neglect her child. If the food is a distraction from her baby take it away till the kid is cleaned and well cared for. You can help her by wiping the kid/s off with a towel. Don't be afraid to wipe the baby down kind of roughly, it's actually good to and gets their blood flowing.

I have had does who want nothing to do with their kid (I have one doe who tried to stomp her kids) in that case take them away from her and don't let her be alone with them. You will have to take the roll of mamma goat.

Post Kidding Supplies - Kid:

  • Goat Coat (or tiny dog coats. If you live in a warmer climate than I do this may not be necessary, but New England is cold! I keep coats on my baby goats almost 24/7 for the first couple weeks)
  • Syringe (Colostrum is the first milk that the mother produces after birth and is packed full of vitamins, minerals, and proteins that will make sure the kid has a healthy start to life. That said, it is important the baby gets the colostrum. If it is too weak to nurse or stand you will have to milk out the mother and feed the kid with a syringe or tiny bottle.)
  • Pritchard nipples and clean, empty soda bottles (You can either bottle feed your kids or you can let the mother raise them. If the mother refuses to raise them you will have to bottle feed. Bottle feeding also makes the kids much more friendly.)
  • Kid Milk Replacer (if the mother doesn't produce enough milk, or if something has happened to the mother, you can use milk replacer. Just make sure the kid gets the colostrum after birth and make sure you get Kid Milk Replacer. Cow or Sheep milk would be bad for the kid and definitely avoid the bags that say they are "multi species". That's not good for kids at all. I use Manna pro Kid milk which you can get HERE
As I said, this is just the basics. There are any number of instances where you will need special equipment or veterinary assistance. 

I have also put together a simple milking list. You can milk with a machine or by hand. I milk by hand, so the list I have here is just for hand-milkers.

Hand Milking Supplies:
  • Milking Stand
  • Grain (the goat will most likely not stand for the milking if she doesn't have food)
  • Iodine or udder wash (in a spray bottle to clean udder before and after milking. I have a gallon size jug of concentrated iodine which I bought 4 years ago and it's about half  empty. You can buy it at any feed store. There's also an udder wash concentrate HERE which in non-iodine)
  • Paper Towels (to clean udder and any messes) 
  • Stainless Steel Pan (you'll want one with a wide, flat bottom that the doe can't easily spill. I actually use a bread pan)
  • Canning Jars (or other clean, sanitary container to store the milk in the fridge)
  • Stainless Steel Funnel (you can buy funnels that are made to hold the filters and sit on the canning jars. That's the way to go.)
  • Milk Filters (make sure you get the right size filters to fit in your funnel)

I hope this is helpful, let me know if I have left anything out or if you have anything to add. 
If you have any questions please leave a comment.


THIS IS NOT INTENDED TO REPLACE ANY PROFESSIONAL VETERINARY ADVICE. IN CASE OF DIFFICULTY OR CONCERN CONTACT YOUR VETERINARY IMMEDIATELY.