A Blog For The Farm Happenings And Whatever Else Strikes My Fancy.
Showing posts with label Crafts. Show all posts

Saturday, 7 January 2017

Our Second Annual Costume Party


Happy New Year Everyone! I hope you all had an excellent holiday season, I know I did! Have you made any great plans for the coming year? 

To celebrate 2017 my family had our Second Annual New Years Costume Party. It was so much fun. Last year was great, but not as great as I had hoped. Due to last years disappointment, I almost didn't have a party this year. We decided to give it another shot to see how it goes (and because I practically attack any chance to wear a costume) and it was smashing! 

My Eldest brother, Forest, is at Fairwood Bible School and, being home for the holidays, he would have been here anyways, but a number of the other students came as well. We also had friends (some whom we hadn't even met yet) from NY come. Church friends came. Family from MA came. It was a fantastic party. I'm not even sure the exact count of how many people were at the party, but I do know we had 11 extra people staying in our home that night in addition to the six of us. 

I have to say, I really love having a house big enough to be able to do this kind of thing. 

All of the costumes were amazing, however the only two I can say much of are mine and my sister's. Mary was Princess Leia and I was Glinda, the good Witch from the Wizard of Oz.

The Princess Leia costume is a a very basic tunic made from a bed sheet. We made a belt to go around it and put her hair up in double sock buns (tutorial to come.)

My costume took a lot more to create, but it was 100% worth it.


MAKING MY COSTUME:

I started with a wedding dress I had found at a thrift store. I asked the woman working there how much it cost and she nearly begged me to take it. Unfortunately, I did not take any pictures of it before I started taking it apart but it wasn't all that pretty. Quite outdated. I removed from the dress the train, 4 bows (three on the front and one huge one on the back), an uncountable amount of tiny white beads, and almost all of the lace, of which there was an abundance. To make it witchy (in a good witch sense) I attached tulle to the sleeves and neck, a tacky decorative square thing to the chest, a HUGE butterfly to the collar, silver beads to the waist,  and 12 yards of pink tulle to the skirt. I also added a myriad of sparkly things for added bling. The crown I made of wax paper and tulle (I will make a tutorial for that later as well). Then I just had to snatch up a wand, put an entire thing of blush on my cheeks, and I was ready to party.

This is by far the girliest ensemble I have ever donned. It's especially unlike me if you consider the fact that last year I was an incredibly accurate Captain Jack Sparrow (a costume I will forever take pride in.) Though I must say, I do like the shock factor that comes when one wears 12 yards of pink tulle. Although, I did have to remind people, repeatedly, that I was a witch... not a princess.

I have already disassembled my dress and have a very exciting project in mind for all that tulle. Details will follow.


COSTUMES:

Among the other characters we had were Audrey Hepburn, Effie Trinket (From the Hunger Games), Super Girl, Mr. Clean, John Luke Picard, Captain Jack Sparrow (Borrowing my costume from last year. Although he was much more in character than I was last year!), a Cowboy, a Ninja, Etc. 


GAMES:


One game we played was a party game I have seen on many different websites, under many different names. I'm not sure exactly who came up with it first, but the idea is that everyone is given a silly phrase for the night. The goal is to say your phrase throughout the night in conversation without anyone realizing that you're using your phrase, you also will try to catch others using theirs. It's great fun. You do have to go off of an honor system and have everyone keep a tally of their own score. It's not exactly a game others can score you on as the whole point is to not get caught. I think it works pretty well though, I just made sure to remind them all ahead of time that lying is a sin and that Jesus was watching. 

 Some of the phrases I used were: 
  • I could really go for some peanut butter
  • I used to be vegan
  • Cut the green wire
  • I've escaped Alcatraz 
  • Like a confused dinosaur 

HERE is the printable PDF page of all the silly phrases I thought up if you want to play this at your own party. It's really a big hit. 

I almost regretted not getting to play this (I knew all the phrases, so it wouldn't exactly be fair) but it really was fun to be able to hear people get away with using them in conversation. 


The other game we played is a trivia/jenga game I created that involved a stacking game like Jenga only with numbers printed on the pieces. HERE is the one I ordered. Each block that was pulled had a new year's themed question according to the number on the block. They aren't easy questions and as everyone was playing I was almost grateful that I already knew the answers and therefore couldn't play. It was a tremendous amount of fun to watch though.

I have written up detailed instructions on how to play and I would definitely recommend this for your next gathering. HERE is a link to the instructions where you can also find a PDF of the questions I used at our party.

And of course I had to dress Lexie up to match


These Chocolate covered Fortune Cookies were the party favors. They were fun to make and such a huge hit! I have a tutorial HERE for how I made them and the tags you can print to make them for Valentine's Day. The image is a link to the tags and sign that you can print at home!


And I'm already eager to plan the our Third Annual! 

Do you have any holiday traditions that excite you? Leave a comment, I would love to hear about them!


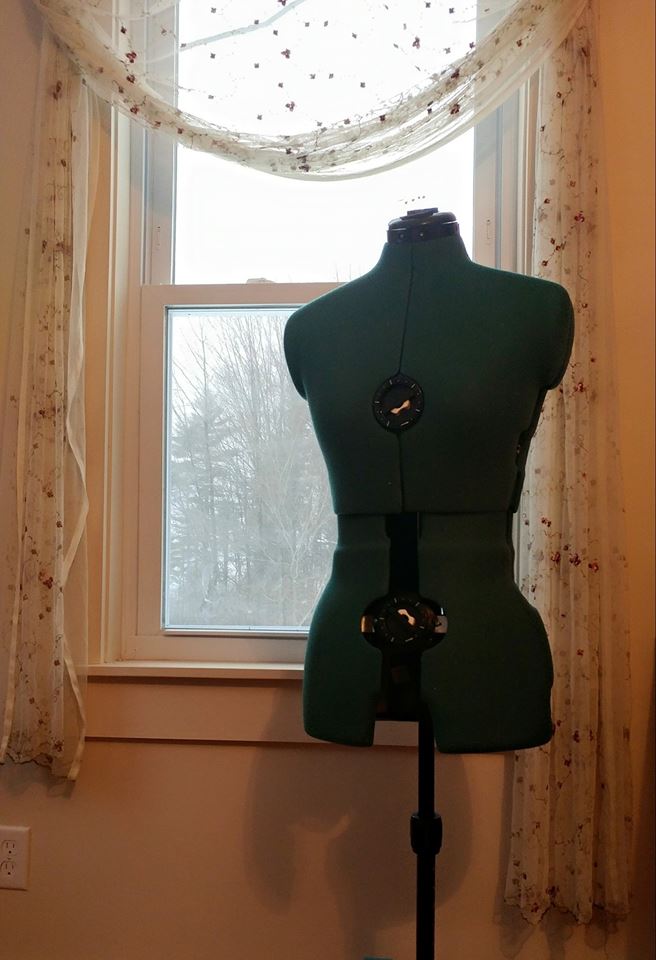

Tuesday, 3 January 2017


I am absolutely in love with the newest addition to my work space! I figured, seeing as how this marvelous dress form will be making frequent appearances in my blog posts, that she deserved her own introductory post. My brother informed me that I had to name her, to which I shouted the first name that came to mind, which just happened to be Giselle. I don't personally feel she needs to have a name, so I doubt it will stick, but you never know. This specific Dirtz dress form can be found HERE and it is one I would suggest. She's easily adjustable and seems durable. I do wish that you could pin into the surface, but I could either get one that was adjustable or pinnable, apparently you can't have both. And there you have it. Isn't she wonderful? 

Thursday, 8 December 2016

'Tis The Season

I am currently working on projects left and right, cool projects, fun projects, projects that make me want to post tutorials and share them with the world! However, I cannot post a single on of them, and I find myself feeling this as a seasonal frustration. I am making Christmas gifts, and Christmas gifts have to be kept a secret, and therefore should not be posted on the web for the world (my family and friends) to see. 

Before and After

With that rant over, I will post a dress I just altered. I don't have a tutorial for what I changed on the dress. It really was very basic though, except for the fact that I added pockets. The pockets though were way easier to do than I expected them to be. I do have a tutorial for the pockets HERE. Other than that, I shortened the skirt, gathered the back a little to take it in, and sewed the shoulder's closed where they had a quite unnecessary and super outdated buttoning thingymabob... I don't even pretend to know what I'm talking about.

Close up on the pockets
If you have a longing for pockets, I would definitely urge you do go for it and slice into your favorite dress. Agian HERE is my tutorial, and there are others online for different styles. 


Back With Gathering 

Maybe after Christmas I'll post some of the things I've been working on... That doesn't usually happen though, does it?

Monday, 22 August 2016

Bed Canopy with Lights


Here's a simple tutorial of the canopy I just made for my bed. I'm super happy with how it came out, It adds just the touch I was looking for in my room. I used a heavy curtains for mine, but you could use any type of material. It would look amazing if you used a flowy or sheer fabric, the lights would look especially cool with something of lighter weight. 

You'll need:
  • 2 curtain rods (I found mine for $2 at a thrift shop and spray painted them)
  • Either four curtain brackets (if they're the right kind, and will work hanging off the ceiling) or four screw hooks with a long screw would also work. 
  •  2 curtains (you can really do it with any material you have, but you'll have to do some extra sewing if it doesn't have the loop for the rods)
  • A drill and screws
  • a stud finder
  • net lighting (Like the Christmas lights you would put over a bush) you can make the canopy without the lights. If you're not using lights, just skip those steps.
  • Safety pins


Start by hanging your curtain rod brackets, Make sure you're screwing into studs. (use a stud finder)  It's important to use studs as there will be a lot of downward pulling on it. I wouldn't depend on hollow wall anchors to hold it up. Put up the brackets to that they are facing outward, that way the screws will all hide under the curtain (It will just be more attractive that way.)


I put the 2 rods 52 inches away from each other, one against the wall, the other 52 inches out from the wall. how far apart you put the brackets will depend on what size bed you have. Mine are up slightly narrower than my twin bed. 

Now, using the two curtains, you're going to be making one long curtain with two sleeves in it.  Leave one curtain the length it is (That one will go against the wall), and cut the bottom off of the other and leave the sleeve on the top. The cut one will be on the ceiling. I cut mine 55 inches from the top. If you want it to be more taught, cut it closer to the distance from the two rods. If you want it to hang down more, make it longer.


With the right sides together, sew the raw edge of the cut curtain to the very top of the loop on the other curtain to attach them. It will be a lot of material for your sewing machine to go through, make sure your machine can handle it, go slowly.


Put the two rods into their sleeves and lay the curtain on your bed the way it would be on the ceiling (With the right Side down) Spread your lights over the curtain, making sure to have the plug on the wall end. 


Safety pin the lights in place. Don't pin it too close to the edge though. you don't want to be able to see the lights or their wiring from the floor, only the light their emitting. 


Hang the curtain rods starting with the one closest to the wall, the bracket will go right over the fabric and hide behind it. Make sure the material is evenly over the rods and that the lights are arranged the way you want them. Then hang the other end. 


If your lights are like mine, you may need an extension cord.


And there you have it. A beautiful and super easy addition to your room. 


Just a hint: make certain your bed is in a place where you really love it, because this is a pretty permanent fixture. I did consider though, that if I was to rearrange my room at any point, that this canopy would look alright above my desk or maybe my dresser. But I don't foresee myself moving things around any time soon.


I love the way it looks at night!


Saturday, 2 July 2016

Refashioned Dress


After Back

I found this dress at a the White Horse Thrift shop in Ossipee for $5. 

Before Front

I removed the skirt, shortened the torso, then re attached the skirt. I also lowered the neck line and shortened the skirt a lot! I am so happy with how it came out. It's flowy and fun to wear. 

Before Back

Finished dress
The front of the bodice had this ribbon all over the front of it. I carefully removed it, But left the little pearl beads on it. They wouldn't really come off without damaging the fabric anyway. 


When the ribbons were removed the fabric had little tiny holes all over it from the stitching. I misted holes with water and used a soft bristle tooth brush to gently brush the material's threads back into place. It doesn't look like the holes were ever there now. 


I really couldn't be happier with how this project came out. 


Monday, 24 February 2014

Breyer Horse Display Boxes

Here's a great project if you have small model horses that you don't know what to do with (like me) Schleich and small (Tiny!) Breyers are perfect. 
I made these out of cardboard, small gift, and jewelry boxes, I used the tops as well as the bottoms. 
Pick a calendar page you like and trace the box on the paper. Add about an inch to each side (or more for larger boxes) and cut it out. Then cut squares out of each corner (the size of the squares will differ depending on what size box you use) and fold the edges up to make a box. It may require some trimming and finagling but it should fit fairly nicely into the gift box. 
I then used other parts of the same picture or pieces of other random things I found and added them for a 3D effect. The one with the waterfall has mica on the floor it and the grey horse is glues to a small rock to make him slightly raised. 
A couple horses I had to hot glue to the box cause they simply would not stay. Hot glue is perfect for the job because you can remove it from the figure fairly easily. the box may rip some but it will come right off the horse. 
I put thumbtacks through the boxes and stuck them on my bulletin board. I also put some horses on top of the boxes. They look great!
And you could make them for other animals too. Schleich has some mother baby sets that would look SO cute.  

I do - once again - apologize for the poor quality of these photos


Tuesday, 5 November 2013

Half Cape

I've had a table cloth mom gave me that I had planned to make a cape with, and I also just bought some pretty curtain like material  at Savers. I found this amazing pattern on line here. I made two capes out of two very different fabrics, an over cape and an under cape. But they can be worn by them selves because they aren't attached. The top one is more elegant,  with a fancier clasp.  The under cape is much more rustic and woodsman looking. 
both
top